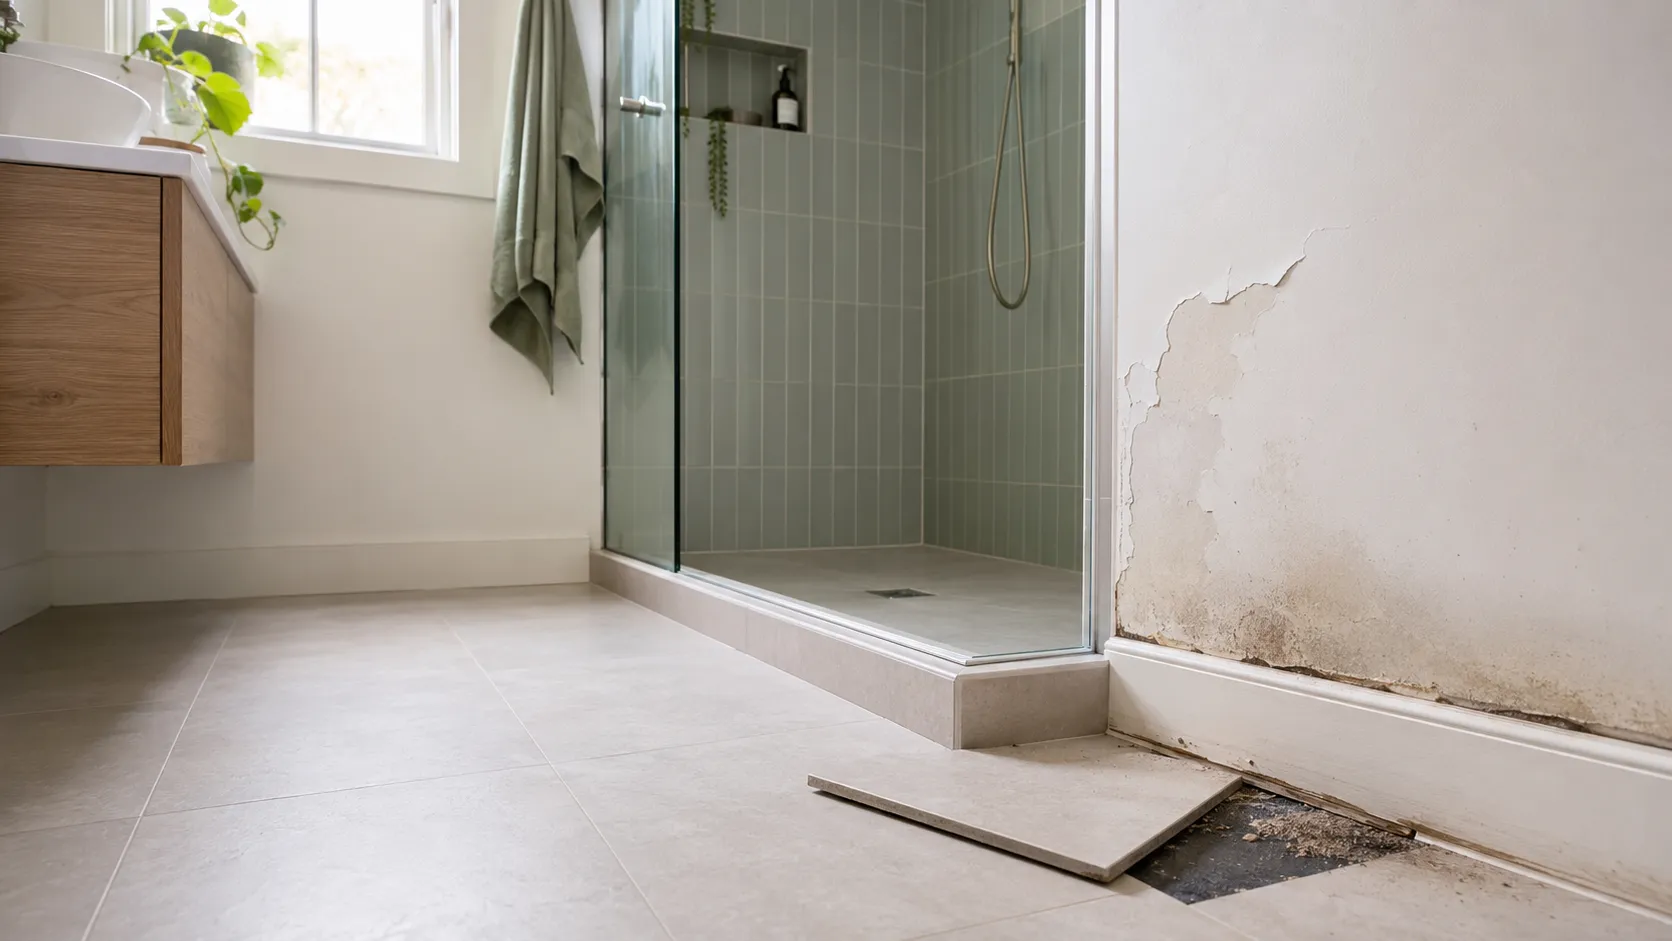
The first warning sign was a small patch of peeling paint outside the shower. The Melbourne homeowner assumed that cracked grout or old silicone had caused the problem.
However, an inspection found moisture behind the tiles and damage beneath the bathroom floor. A small waterproofing mistake made during renovation now required tile removal and structural repairs.
This is why waterproofing mistakes in Melbourne bathrooms can become so expensive. The problem often remains hidden until water reaches walls, floors or adjoining rooms.
Why a Small Waterproofing Mistake Becomes Expensive
Tiles and grout do not provide the bathroom’s main waterproof barrier. The membrane beneath them protects the walls and floor from moisture.
The complete system also includes sealed corners, pipe penetrations, waterstops, floor wastes and correct drainage falls. If one part fails, water can enter the structure and travel away from the original leak.
Contractors may then need to remove undamaged-looking tiles to reach the defect. They may also discover mould, rotten timber, swollen plasterboard or damaged flooring.
Seven Waterproofing Mistakes Melbourne Homeowners Should Avoid
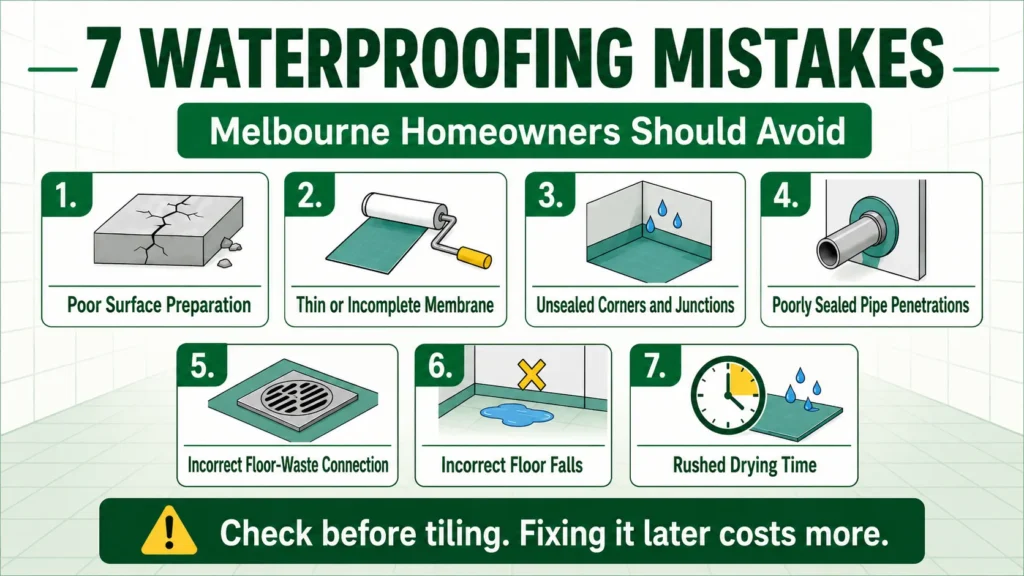
1. Applying Waterproofing to an Unsuitable Surface
Waterproofing needs a clean, dry and stable surface. Dust, grease, cracks, moisture or loose sheeting can stop the membrane from bonding properly.
The contractor should repair defects, prepare the substrate and apply the correct primer before adding the membrane.
2. Applying an Incomplete or Thin Membrane
Thin coats, pinholes and missed sections create weak areas. These defects may remain invisible once tiling begins.
The contractor should follow the selected product’s coverage and thickness instructions. Simply saying that the bathroom received two coats does not prove correct installation.
3. Missing Corners and Junctions
Wall-to-floor junctions and internal corners experience movement. As a result, they need careful sealing and reinforcement according to the chosen system.
A small gap in these locations can allow moisture to spread behind several rows of tiles.
4. Poorly Sealing Pipe Penetrations
Mixers, taps and shower outlets create openings through waterproofed walls. Water can enter the wall cavity if the contractor fails to seal these penetrations correctly.
Silicone around the visible fitting should not replace proper waterproofing behind it.
5. Connecting the Membrane Incorrectly to the Waste
The membrane must direct water into the drainage system. A poor connection around the floor waste can let water escape underneath the shower floor.
This failure may damage the subfloor or create stains on the ceiling below.
6. Creating Incorrect Floor Falls
Bathroom and shower floors need appropriate falls toward the waste. Poor falls can cause standing water or direct water toward the doorway.
Large tiles can make correct falls harder to achieve in small areas. Therefore, the tile size, drain position and floor design need early planning.
7. Rushing the Drying Time
Every waterproofing product has its own recoat, curing, tiling and testing periods. Temperature, humidity and substrate conditions can also change drying times.
Tiling too early can trap moisture or damage an uncured membrane. Contractors should follow the full manufacturer instructions instead of using one drying time for every product.
Warning Signs Your Waterproofing May Be Failing
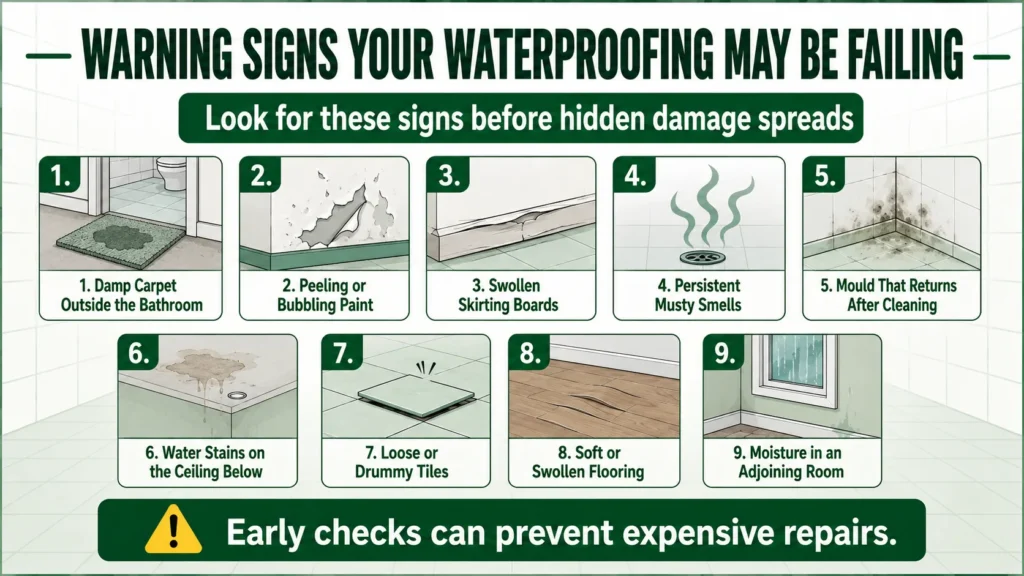
Cracked grout, surface mould or discoloured silicone does not automatically prove membrane failure. These signs can also indicate poor ventilation, failed surface seals or maintenance problems.
However, homeowners should not ignore them. Early investigation can prevent moisture from spreading further.
Is It a Plumbing Leak or Waterproofing Failure?
A wet patch does not reveal the source. Water can move through wall and floor cavities before becoming visible.
Start by recording when and where the moisture appears. Photograph the damage and stop using the affected shower where practical.
A licensed plumber can test the water supply, waste and drainage connections. If the plumbing remains sound, a building or waterproofing specialist may use moisture meters, dye tests, controlled spray tests or flood testing.
Thermal imaging can identify unusual temperature patterns, but it does not see water directly. An inspector should confirm the result with moisture readings or another targeted test.
Avoid demolition until the builder, insurer or owners corporation has had an opportunity to inspect the damage.
Can a Shower Leak Be Fixed Without Removing Tiles?
Some leaks can be repaired without removing tiles. Regrouting or resealing may work when failed grout or silicone causes the leak and the tiles remain stable.
However, a surface repair cannot rebuild every concealed waterproofing detail.
Tile removal may become necessary when:
- The membrane has failed extensively
- The shower base or substrate has deteriorated
- Tiles have become loose or cracked
- The floor waste connection has failed
- Incorrect falls need reconstruction
- Mould or timber damage requires access
- Previous surface repairs have failed
Homeowners should ask the repairer to explain the confirmed cause, proposed repair method and warranty limitations.
What Should Homeowners Check Before Tiling?
The best time to inspect waterproofing is before tiles hide it.
Confirm that the contractor has prepared and primed the surface correctly. Check that corners, junctions, pipe penetrations, niches, waterstops and floor wastes have received proper treatment.
The floor should also fall toward the correct waste. The membrane should show complete coverage without visible pinholes, thin areas or damage.
Victorian wet-area work must follow the National Construction Code and the relevant compliance pathway, including AS 3740:2021 where applicable. The exact requirements depend on the bathroom design, substrate, shower type and drainage arrangement.
Keep date-stamped photographs, product information, invoices, practitioner details and test results. These records may become valuable if a leak appears later.
How Much Can Waterproofing Failure Cost?
Published planning estimates place initial bathroom waterproofing around AUD 500 to AUD 1,800. However, repairs cost much more once workers must remove tiles and replace damaged materials.
A partial shower repair may cost several thousand dollars. Rebuilding a shower or repairing a damaged subfloor can cost much more. Extensive damage may require a complete bathroom reconstruction.
Home insurance may exclude gradual leaks, failed waterproofing and poor workmanship. Victorian building warranties may help in some cases, but the contract date, builder, project value and evidence can affect the outcome.
Apartment owners should also notify their owners corporation. Responsibility may depend on the cause, renovation history and plan of subdivision.
Fix the Cause Before the Damage Spreads
The homeowner’s peeling paint was not the real problem. It was the visible result of a hidden waterproofing defect.
At Skilled Tradies Melbourne, we focus on identifying the cause before recommending repairs. Early diagnosis, correct installation and pre-tiling documentation can prevent a small construction mistake from becoming an expensive bathroom repair.
Frequently Asked Questions
How can I tell if a shower leak comes from plumbing or failed waterproofing?
A wet patch alone cannot confirm the cause because water may travel through walls and floors. A licensed plumber can test the supply and waste pipes first, while a waterproofing or building specialist can use moisture readings, dye testing and controlled flood tests to investigate the membrane.
Can failed bathroom waterproofing be repaired without removing tiles?
Regrouting or resealing may solve a confirmed surface-joint problem when the tiles and membrane remain sound. Tile removal may be necessary when the membrane, floor-waste connection, substrate or shower base has failed, or when hidden mould and timber damage require access.
What should Melbourne homeowners check before bathroom tiles are installed?
Check that the contractor has prepared the surface, sealed corners and penetrations, connected the membrane to the waste and created suitable floor falls. Victorian wet-area work must follow the National Construction Code and the applicable waterproofing pathway, including AS 3740:2021 where relevant. Keep dated photographs, product details and test records before tiling begins.